
TeamSnap account and App
Following are some of the TeamSnap most frequently asked questions. Please look for assistance on this page and reach out at [email protected] if you still need assistance with your TeamSnap Account.
Kickoff Guide for Members and Fans
Welcome to TeamSnap! A few minutes is all it takes to get up and running with your team. These tips for getting started are aimed at players and their fans (parents, guardians, family members).
Accept Your Invitation
-
- Go to your email and find the TeamSnap invitation from your coach or team manager
- Click the blue Join Now! button
- If you’ve been invited but can’t find the invitation email, click here and we’ll help you track it down.
- Create a password

- If you have an existing TeamSnap account under a different email address, click Switch Account to log into the existing account
- Click Continue
- Select Yes or No for whether you are accepting for yourself or on behalf of someone else
- If No, enter your name and relationship to the player
- Click Continue
- Enter your mobile number and select your provider if you'd like to receive team alerts to your mobile device
- Tip: If you don’t want to share your number with teammates, check the box next to “Make Private.” Coaches and team managers will be able to see phone numbers even if this box is checked.
- Click Continue
- Select Yes or No for adding family member access to your account
- If Yes, complete the remaining fields for family member information
- Click Continue
- Click Take Me to my Team! and you are all set!
Set Your Notification Preferences
- Log into your TeamSnap account
- Click your team name under My Teams in your My Leagues and Teams dashboard
- Click the Preferences tab
- Set your preferences for how you'd like to receive alerts. We recommend leaving the settings as they are, but you can always adjust things like how far in advance you receive game reminders.
Download the TeamSnap Mobile App
The only thing better than TeamSnap is TeamSnap in your pocket wherever you go! Download our free app for iOS or Android, log in with your new username and password, and feel the power!


Update Your Availability
A few days before each game, you’ll get an email asking if you’re available or not. Make sure to click Yes, No, or Maybe, so your coach has an accurate headcount for the game.
Check for Volunteer Tasks
Head over to the Assignments tab to view any available assignments for your upcoming scheduled events. When you find one you’d like to claim, just check the sign-up box next to that task!

Try TeamSnap Live!
Want to provide live scoring updates, share pictures, and talk about the action with your team in real time? You can use the Team Chat feature to communicate with other members any time, and separate event chats will open up during game and event times for everyone to stay up-to-date in real-time!
It comes with our free mobile apps, so give it a try!
Forgot Password Link Issues
If you click the Forgot Password? link on the login screen you will be asked to enter your email so we can send you a password reset email. If you do so and do not receive an email with the subject "Reset your TeamSnap Password," there could be a few reasons why:
- The password reset email could be caught in your SPAM/junk filter, please check your SPAM folder.
- Your browser could be using old cached information and auto-logging you into the wrong account even though you are entering the correct login credentials. Please clear the browser cache and try logging in again.
- Your account may be under a different email address, or there could be a typo in your username in the system. The password reset email will be sent to the email address used when your TeamSnap account was set up. Please try entering all of your email addresses in the reset password link, and check all email accounts that you may have used.
Adding Family or Contacts (Web)
- Click the Roster tab
- Click on member name
- Click + Add Family Member button

- Enter contact details (first name, last name and email address required to send invite)
- Optional: Enter a label to help easily identify the contact or the contact/player relationship
- Select the Invite to Join? checkbox at the bottom of the screen if you'd like this person to have access to the team under this profile
- Click Save
Adding Family or Contacts (iOS)
- Tap the Roster tab
- Tap on the primary member's name
- Tap Edit in the top right
- Tap + Family Members
- Enter contact details
- Suggested: Enter a label to help easily identify the contact or the contact/player relationship
- Tap to toggle Invite to Join to ON at the top of the screen
- Tap Save in the top-right corner
Adding Family or Contacts (Android)
- Tap the Roster tab
- Tap on the primary member's name
- Tap Add Family Member
- Enter contact details
- Tap the gear icon next to the email field
-
- Suggested: Enter a label to help easily identify the contact or the contact/player relationship
- Tap to toggle Invite to join to ON
- Tap OK
- Tap the checkmark icon in the top-right corner to save
What happens if my installment payment fails?
If you have installment payments set up, payments should process smoothly on the specified dates. Who doesn't love a set-it-and-forget-it scenario? If you do run into an installment payment failure, read on to see how it can be addressed.
Registration Installments
When a registration installment fails:
- Payment will be re-attempted three times.
- If the failure error is returned that the card is being explicitly blocked from transactions, the payment is completely locked and no further attempts will be made for that or any of the following installments for that transaction.
- Resolution: The cardholder must enter their card information as a new payment method rather than attempting to update the current method, and select to pay the installment then or ask their organization's admin to reset the registration installment dates to reset the payment attempts and future installments.
- If the installment was declined due to non-sufficient funds 3 times, processing attempts will stop until the next installment date occurs, skipping over the initially failed installment.
- Resolution: An admin for your organization would need to reset the installment date for that initially failed installment in order to get that payment installment processed.
- If the failure error is returned that the card is being explicitly blocked from transactions, the payment is completely locked and no further attempts will be made for that or any of the following installments for that transaction.
Invoice Installments
When an invoice installment fails:
- Payment will fail - currently, there will be no further attempts to process the payment
- Resolution: Cardholder can update credit card information to trigger the system to re-attempt processing
- Resolution: Admin can cancel the invoice and create a new one with the remaining invoice balance
Manage Registration Payments
Update Credit Card for Registration Installment Payments
- Login to TeamSnap from a web browser at https://go.teamsnap.com
- On the My Teams and Leagues Dashboard go to the My Registrations section.
- Click Manage Payments
- Click Update Credit Card
- Enter credit card information
- Click Update Card
Pay Installment Payments In Full
Want to pay your remaining installment payments in full? No problem!
- Login to TeamSnap from a web browser at https://go.teamsnap.com
- On the My Teams and Leagues Dashboard go to the My Registrations section.
- Click Manage Payments
- Click Select Payments
- Select the installment payments you'd like to pay

- Click Pay Now
Enable/Disable Your Email Address
If you want to manage whether your roster email address receives TeamSnap messages, or you have multiple emails and want to prevent messages from being sent to one or more of them, you can manage that in your roster settings. Additionally, if you have any trouble receiving emails and have received an error regarding email receipt, your email may have been disabled by our system to prevent further errors.
Enable/Disable Email Address (Web)
- Log into TeamSnap.com
- Enter your team
- Click the Roster tab
- Click on Manage My Player Info button OR click your name on the roster
- Click Edit
- Select or deselect the Receive emails box for the email in question

- Click Save
Enable/Disable Email Address (Android)
- Open the TeamSnap app on your Android device
- Enter your team
- Tap the Roster icon
- Tap the member name
- Tap the pencil Edit icon in the top right corner
- Tap the gear icon next to the email address
- Toggle the switch for Receive Team Emails to ON or OFF
- Tap the check mark to save
Enable/Disable Email Address (iOS)
- Open the TeamSnap app on your iOS device
- Enter your team
- Tap the Roster tab
- Tap the member name
- Tap the Edit icon in the top right corner
- Tap the email address
- Toggle the switch for Team Emails to ON or OFF
Mobile Push Notifications
TeamSnap uses mobile push notifications to deliver messages in a snap!
What is a push notification?
A push notification is a message that pops up on a user's mobile device and will only appear if the recipient has the iOS or Android TeamSnap mobile app installed and push notifications enabled on their device and in the TeamSnap app for the specific type of notification. While similar to text messages, Push Notifications are in-app messages and are not delivered by SMS text.
When are push notifications sent?
- Event/Game creation (when Notify the Team is checked by admin)
- Event/Game update (when Notify the Team is checked by admin)
- Availability reminders sent out by team admin
- Score updates
- Lineups when published by team admin
- TeamSnap Live! (Live! score updates, Live! game/event messages)
- Team Chat
- Alerts created through the Messages tab
How can I receive Push Notifications?
In order to receive push notifications you must have the following:
- The latest version of the TeamSnap app for iOS or Android installed on your device
- Be logged in to the TeamSnap app on your device
- Have Mobile Notification Preferences set to receive Push Notifications for the specified team with the TeamSnap app
- Have Push Notifications enabled for TeamSnap on your device application settings
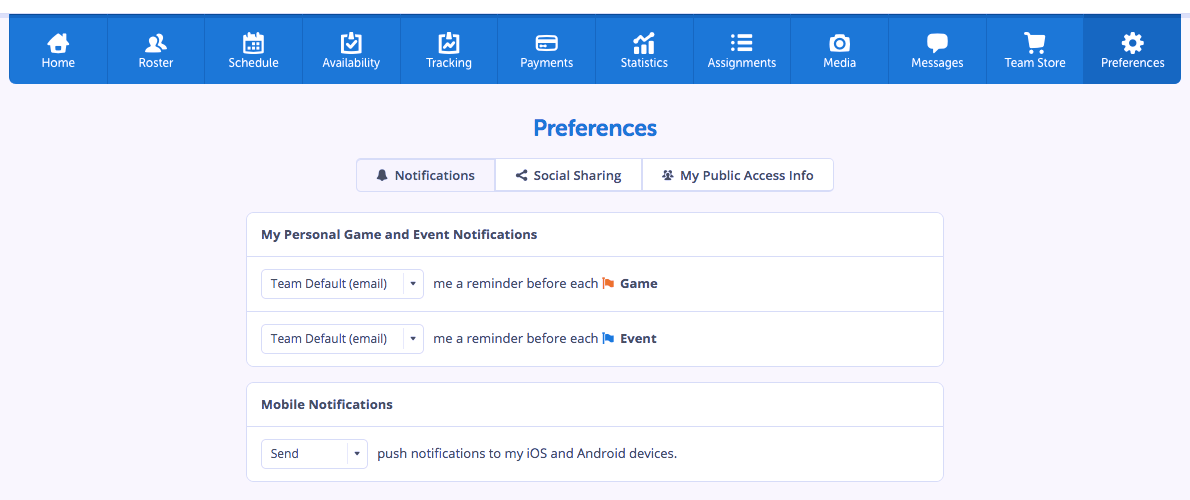
Set Mobile Notification Preferences in the TeamSnap App
From the TeamSnap web app
- Login to TeamSnap from a web browser
- Navigate to the team you'd like to set your preferences for
- Click the Preferences tab
- Click the Notifications tab
- Set notification preferences for Mobile Notifications to Send
- Preferences are auto-saved!
From the TeamSnap Mobile apps
- Login to TeamSnap on the mobile app
- Navigate to the team
- Navigate to the Menu
- On iOS tap My Preferences
- On Android tap Notification Preferences
- Under Mobile Notifications, tap to toggle switch your preferences - possible options depending on the team plan level are Alerts and Schedule Updates, Live! Score Updates, Live! Game/Event Messages, Team Chat Messages.
Enable Push Notifications for TeamSnap in Device App Settings
Continue to the steps for your mobile device OS below to finish enabling push notifications
Enable Push Notifications (iOS)
- Tap Settings
- Locate and tap TeamSnap in app list
- Tap Notifications
- Tap to toggle Allow Notifications switch ON
- Tap to toggle Badge App Icon switch on (other toggle switch settings can be set to your preference)

Now, whenever you receive TeamSnap alerts a small red badge marker will be displayed on the TeamSnap app icon indicating that you have new unread information.
Enable Push Notifications (Android)
- Open device settings
- Tap Notifications
- Locate and tap TeamSnap in app list
- Tap to toggle Allow notifications switch on (other toggle switches can be set to your preference)
- Open TeamSnap app
- Tap sliding menu icon
- Tap Notification Preferences
- Toggle the Alerts and Schedule Updates switch on
- Tap the Done checkmark
If you do not see the TeamSnap app in your phone’s Notifications settings, you may not have given the app permission to send notifications the first time you downloaded it. To fix this, please delete the app, then download it again.
Team Schedule is not Updating in Google Calendar
TeamSnap pushes schedule changes within one hour, while Google Calendar typically updates on a 12-hour cycle for subscribed calendars. This means that it is necessary to wait for the next Google Calendar refresh update. Depending on where you fall in the cycle, it can potentially take up to 24 hours to display changes to your subscribed calendar.
Force Google Calendar Refresh
This trick will trip the Google system into thinking that you are requesting a totally new URL and will push it to make a new request rather than syncing to the cached version of your subscribed team schedule.
- Unsubscribe from your team schedule
- Re-subscribe to your team schedule following the steps in Subscribe to a Team Schedule, but stop at step 8
- When pasting the full calendar URL into the 'Other Calendar – Add by URL' field, add the following to the end of the URL immediately following .ics before you hit Enter: ?query=1
- Your URL should look similar to this example:
http://ical-cdn.teamsnap.com/team_schedule/yourspecificteam.ics?query=1
- Your URL should look similar to this example: